

“My favorite thing to
say on camera is oh, This is a fun thing
to do with kids. And I’ve never once baked
with kids in any of my videos Or really in real
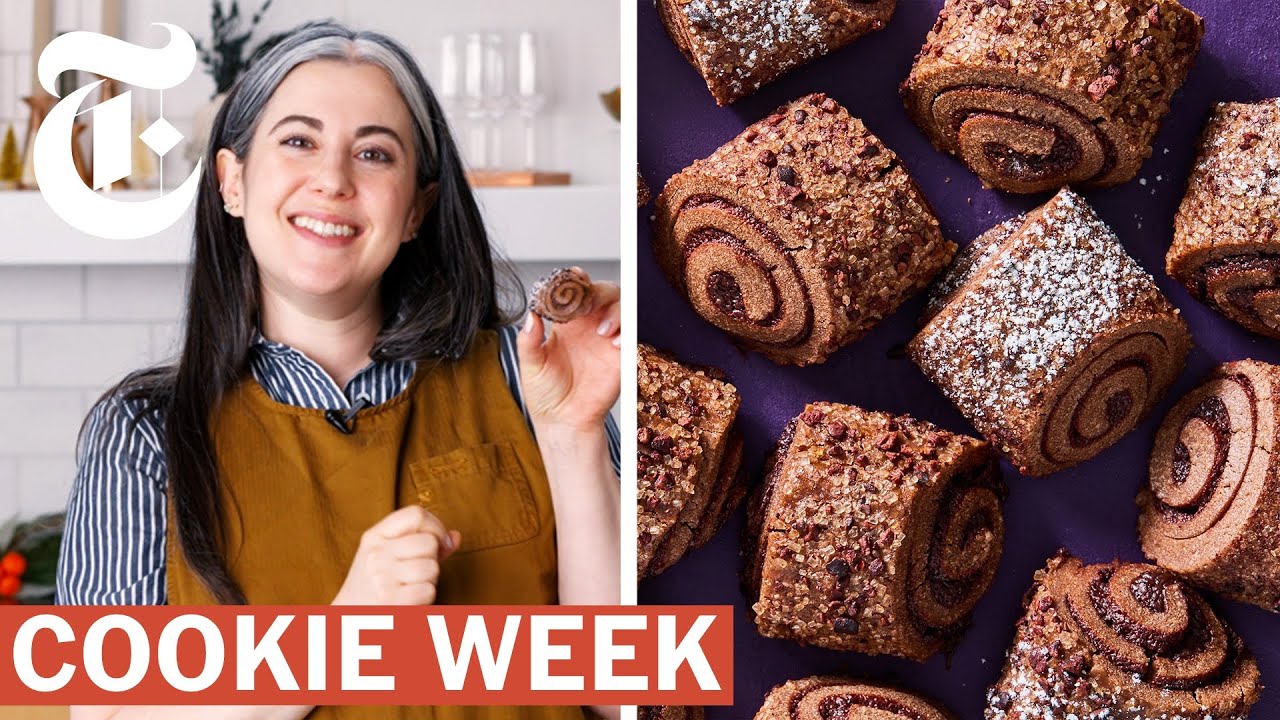
life at all.” [MUSIC PLAYING] “Hi, everyone. I’m Claire Saffitz. I’m in the NYT cooking studio
because it’s Cookie Week. And I’m going to show you my
contribution to the Cookie Week lineup. It’s my Buche de Noel cookies. So Buche de Noel, meaning
holiday log in French — We call them yule log here. It is basically a
rolled cake that Is meant to look like
a decomposing log. Making an actual Buche de
Noel is extremely festive And in the holiday spirit,
but is also a huge pain. So I’m turning it
into cookie form, Which you can make a
lot of them at once. I do tend to rely on
cookies that are freezable. So I like cookies where you
can make a whole bunch of them At once and they’re
easy to portion. And then you can freeze them
and bake them off as you need. Freezer cookies are
like cookies on demand. It’s a lot easier, simpler. And you get all the kind
of deliciousness and all The cuteness that you want. And then you can gift them
versus one big Buche de Noel. So the first thing I’m going
to do is make the coating. This recipe uses
a food processor. You use it to make the
coating and the dough. So my thing is if you’re going
to get your food processor Dirty and have to
wash all the parts, You might as well use
it as much as you can.
So this is a
chocolate-flavored cookie. And cacao nibs are the
actual cacao plant. So they taste like chocolate. But they are not
sweetened at all. So they’re really bitter. Demerara sugar then
a nice pinch of salt To season everything. So we’re going to grind this
until it looks like very Coarse sand. This is both textural and
it’s going to add a little Sweetness and crunch. But it’s also part of
the look of the cookie. O.K. This looks good. So I still have some slightly
larger pieces of cacao nibs, But nothing bigger than
a piece of bulgur wheat. I don’t if that’s
descriptive for everyone. But I’m going to transfer
this out of the bowl. And now, no need to clean
out the bowl of the food Processor. But we’re going to now use
this exact same food processor To make the dough. So I’m going to start by
combining my dry ingredients. I’m using all-purpose flour. You’ll need a little bit
of additional flour, FYI, For rolling out the dough. My flour measuring tip is
to always decant your flour Into a separate container. Don’t leave it in the
five-pound bag or whatever bag You buy it in. Because it gets
really compacted. So I like to then
scoop with a big spoon. And then something
that my mom always Did, which I just do out of
habit because of watching her Is I chop it up a little bit.
And that’s kind of just to
see if there’s any big air Pockets. And then level. So that’s just to ensure that
you don’t have too compact A cup and end up adding more
flour to the recipe than you Really want to. Actually, same thing
with powdered sugar. I do like to put it into
a different container. Also, it’s such a pain
to measure from the bag. It goes everywhere. O.K., the next ingredient — 3 tablespoons of cocoa powder. So it’s not a very
intensely chocolatey dough, Mostly because I want the
color to be a little bit more Of a pale brown because I want
contrast between the dough And the filling. That said, cocoa powder is
a very strong ingredient. And a little bit
goes a long way. So I have two kinds
of cocoa powder here. You’ll often see in a recipe
that calls for Dutched Or Dutch-processed cocoa. So natural raw cocoa
powder is super acidic. And when it’s Dutched
or Dutch-processed, It is neutralized with
an alkalizing agent. And it tends to give it
a more round, roasted, Deeper chocolatey
flavor and neutralizes Some the more fruity tones. Because it changes
the acidity, It means it does change
the way it can interact With other ingredients,
like chemical leaveners, In the recipe. But the point is
sometimes, it matters. And sometimes, it doesn’t. Here, it doesn’t matter.
So I’m just going to use
the natural cocoa powder. So — oh, then salt, a 1/2
a teaspoon of kosher salt. Any time I’m making
any chocolate recipe, I always add a good
amount of salt. Because it really does
bring out the flavor. So I’m just going to
pulse this to combine. It’s really easy when
you’re adding cocoa powder Because you can see
when it’s combined. O.K. So this is 12
tablespoons, or a stick And a half of unsalted butter. You can see, it’s
cubed up and it’s cold. It’s going to
make a cold dough. And that’s going to be
easier to work with. And it’s going to cool
down faster in the fridge. Because we want to roll
out a chilled dough. And I want to pulse it until
the butter has not totally Disappeared into the dough,
so finer than you would go If you were making pie dough. O.K. So this is
what it looks like. There’s still some
bits of butter. Here’s a little piece. But you want the butter to
be really well broken down Into the dough. Now, I’m going to add
my liquid ingredients. The sour cream gives it
just a little bit of tang. And it’s also tenderizing. If you don’t have sour
cream, because it’s only 2 Tablespoons, so you
can use Greek yogurt. The egg is really
useful in this dough Because it does enrich it. But it also is
like a good binder. It helps to keep
the dough together. And then 2 teaspoons
of vanilla extract. So I just want to
whisk this together.
So once that’s smooth, we’re
going to add it to the dough. And it’s just going to go
until the whole thing forms A ball of dough
around the blade. You’ll see, it’s going to
hydrate and turn into this Chocolaty dough. All right. So now, I’m done with
the food processor. And we have our dough. Here it is. You see, it’s not
a very dark color. It’s a pale-ish
moderate cocoa color. It’s a nice stiff dough. It’s not sticky at all, makes
it really easy to work with. Now, I want to divide this
into three equal portions. Of course, you
could eyeball this. But just for the sake of the
final cookies and how they Look, it’s better to weigh so
you know you’re being precise. So I’m just going to — Got 211, 230, 232. Close enough. O.K. So somewhere in that 230
range, maybe a little more. So I take each portion. And again, it’s super
easy to work with. You shouldn’t really need any
flour on the work surface. And I just start by rolling
it out into a 9-inch-long log. I would say that I use a ruler
in the kitchen pretty often. I understand people
that would think That feels excessively fussy. But it really is helpful. So just always good to
have a $0.50 plastic ruler In your crock of
kitchen utensils. So now, we’re going to
wrap them in plastic. And then you’re just
going to use your hands. And I’m just going to
flatten it into the makings
Of a rectangle. One thing that I always
think about is the shape that The dough is in when it goes
into the fridge is the shape That it’s going to want to be
when you take it out and roll It. So now that I have this shape,
I’m going to use the plastic To wrap it. So you can see, I’m
pressing out the air. And now, I have
this little packet. I’m going to turn it over. So I take the rolling pin. And I just like to
go over the dough Lengthwise and crosswise. And this helps to not only
even out the thickness, But it also helps to force
the dough into all the edges And corners so that I’m
making a really neat packet. This is going to make your
life so much easier when It comes to rolling
out the dough. Because you’re already
starting from this really nice Rectangular shape. So these should chill for at
least one hour in the fridge. While the dough is chilling
is the perfect time To make our chocolate filling. So the filling is a
straight chocolate filling. Really, the base is
melted chocolate. So it does give a very
chocolatey, silky texture To the inside of the cookie. So I’m going to do this
over a double boiler, Which is my preferred method
for melting chocolate. The idea is that
basically, you Have a lower piece that has a
little bit of simmering water In it. So I’m going to turn this on. I have about an inch of water
in the bottom of the saucepan.
And then you set a
heatproof bowl over top. So that’s what a
double boiler is. And it’s just a very gentle
way to warm or heat or melt Things. Semi-sweet chocolate
anywhere in the 60 percent To 70 percent cacao range,
I think, is really nice. Then I have 6 tablespoons
of unsalted butter. And I just want to let
all that melt together. And then it has
one yolk in it. And then I’m
reserving the white. That’s really important. Because I do end up
using that later. I do really appreciate recipes
where I’m not left with random Yolks or random egg
whites at the end. So the yolk, it’s helping to
stabilize the filling in a way That it’s not
going to leak out. So this is basically melted. I have the tiniest little
bit of butter left. I am going to leave the
saucepan right there With the water in it. There’s a chance that I might
need to rewarm the filling Ever so slightly to
make it spreadable. Because it will
thicken as it sits. So it just depends on the
temperature of your kitchen And how fast you’re working. I am sweetening
it a little bit. I’m using powdered
sugar, again, For that reason that it
dissolves really instantly. Then I’m going to add
a tablespoon of flour. It’s also just there to fix
everything and make sure that It sets as it bakes. So you can see, it starts
out very, very fluid. And that’s mostly, actually,
on account of the butter. And so we just want
to let this sit
Until the mixture thickens. It’s going to
thicken as it cools. You can see, it’s already
starting to thicken up A little bit. So this has actually been
in the fridge overnight. You can see, it’s
nice and firm. I have a piece of
parchment paper here. This is what I’m going to
use to roll out the dough. So I’m going to start by
giving it a little bit Of flour right on your
parchment paper and then A little extra flour on top. I’m going to start by rolling
this out with anything that I’m rolling. I like to always give
the dough some movement. So after several passes
with the rolling pin, I like to lift it up, make
sure it’s not sticking too Badly. You can always give
it a little more flour To prevent sticking. Now, this is a really
forgiving, nice dough. So you shouldn’t have a lot
of issues with sticking. Even though we’re
going to trim it, You do want to take care to
make the edges as straight As even as possible. The parchment is really great
to have because you can see How I’m turning it to help me
achieve the size that I want. It’s a decent rectangle. But I am going to trim it
to make really neat sides. So you can see that I’m
actually just eyeballing The straightening. You can use your
ruler if you need to. This is what the filling
looks like once it’s cooled. I overshot it a little bit. So now, it can just sit over
here in a slightly warm spot.
But it’s still spreadable. So I’m going to measure
about 1/3 of a cup. This is why you don’t
want it so liquid. It’s like, this is going to
be much easier to contain And work over the dough. So I’m just kind of
distributing the filling. It’s a fun dough to work with. It’s a fun filling
to work with. This is a very
satisfying motion To spread it over
this rectangle. So then, using my
offset spatula, I’m going to work the
filling into an even layer. I just want to leave a small
border on the long end that’s Further away from me. And then everywhere else, you
can go right to the edges. So now, I’m going
to roll this up. And it’s the same way that you
would roll if you were making Cinnamon rolls. So I’m going to start at the
long end with full filling Coverage. And I like to start with
my thumb and forefinger To just get the dough going. And this is where I
like to try to make It as tight as possible. Because I don’t want a spiral
that has a hole in the middle. It’s not sticking
to the parchment. So it’s really easy
to do this part. And the whole idea here is
that I’m getting a really Thin, long spiral. And that’s because I want them
to have the kind of dimensions Of Buche de Noel, which
is long and skinny. So then you get to the
end that had no filling. And that’s where you’re going
to just let it rest on that Seam.
So here, you have the first
piece of dough all filled, Ready to go. It’s not so soft. It’s not going to lose
its shape if you handle it A little bit. And this can just
hang out here. And now, I’m going to repeat
that exact same process with The remaining
portions of dough. O.K.? Can I do that? O.K.” [MUSIC PLAYING] “You want to just chill them
until the dough is firm again. And that’s going to
take 20 to 25 minutes. So you can see, from
that nice brief chill, That they’re nice and firm. Now, I have that cacao nib
and demerara sugar coating. This part’s fun. You can just spread this right
over that same baking sheet. Beat the egg white a
little bit with a fork. And that’s mostly because,
when you have an egg white, How it holds
together like that, You want to just
liquefy it a little bit. I just want to break it up. I have a pastry brush here. So I’m just using
my pastry brush, Starting with one of the
logs, giving it a really thin But even coating. So now, this is going to
go onto the baking sheet. And this part’s really fun. You’re just going to roll
it and toss the filling over The log until
it’s fully coated. Does this look
like a tree branch That then we can cut and have
it look like Buche de Noel?
Hopefully. If you had a lot of
excess flour from rolling, Go ahead and brush it
off before this step. Because you don’t really want
that flour to mix with the egg White. You should have
plenty of coating To get through all three
logs, plus probably A little bit left over. And now, we’re very close. I realize, we’re getting up
there in number of steps. There’s one final step,
which is a quick freeze, Just until the dough is
very, very firm to the touch. So it’s 10 to 15 minutes. It’s not that long. O.K. So now, we’re finally
ready to slice and bake The Buche de Noel cookies. This makes 36 cookies,
which is quite a few. But because, as I was
saying, the dough really Holds its shape,
you can actually Get away with
baking all of them On one cookie sheet,
which is great. So I have a
half-sheet pan here With a piece of
parchment paper. I’m going to slice
them one log at a time. And the first thing is
to actually just trim off The ends. And you can see how
nice that spiral looks. So you’re just cutting
to expose the ends. This is actually weirdly the
part where you don’t need A ruler. Because I’m just
going to eyeball it. But I’m going to start by
cutting the log in half. And then I’m going to cut
each half into three pieces, Into thirds.
And you can see, the
dough is very firm. So now, I have my
six equal pieces. Now, I’m going to cut
each piece in half again. But this time, I’m going to
angle the knife at a 45-degree Angle. So you’re going to start to
one side of the piece and cut Downwards like that. Then they’re going to rest
on the rounded, coated side. But you want the
spirals exposed. So you want the flat side
on one end and the cut Angled end facing
up on the other. And I’m going to
repeat that process.” [MUSIC PLAYING] “You can see, after
all of that effort, Actually how quickly
and easily they cut. O.K. So here are
all 36 cookies. They’re ready to bake. They will slump a little bit. But they’re not
going to spread. And they’re going to bake
until the dough is a little Bit puffed. And it’s going to feel
firm to the touch. So 20 to 25 minutes. So here they are. I love that when they
come out of the oven, You get even more of a
sense of the color contrast And the spiral, so that
darker filling and then The lighter dough. They look great. And they smell so good. So now, these
just have to cool. You can transfer them
to a cooling rack To speed it along. I mentioned at the
top about freezing
After the coating and
the slicing and the angle And everything. Once you have those
formed cookies, That’s actually the perfect
time to freeze them solid. So you can see how I arranged
them on the baking sheet. Instead of putting them in the
oven, put them in the freezer. Wait until they’re
frozen solid. And then you can gently
pack them into a container. And then you can
bake them on demand. Now, in terms of storage
tips for the baked cookies, Once these are fully cooled,
they store really well. So just store in an airtight
container at room temp. They’re really great for
gifting because you can pack Them in a tin.” [MUSIC PLAYING] “So after all that work, at
least you have 36 cookies, Which is quite a lot. I also think they’re the
perfect three-bite cookie. I’m going to taste. Mm, very delicate. The dough is so tender. And I love the crunch
on the outside. It’s still not too sweet,
nice and chocolatey. There’s something very festive
about it, which I really love. Mm. My advice for the holidays
— get more flour, sugar, And butter, and eggs than
you think you’ll need. Use your freezer. Your freezer is your friend — Frozen cookie dough,
frozen butter. Take what you think you
want to do for the holidays And cut it in half. And then actually
do that amount. And then you’ll be so
happy because it’s like,
You won’t have been
overly ambitious. And then maybe you’ll
enjoy yourself, Which is always important
for the holidays. I will say, with
holiday cookies, It is a balancing act between
the visuals, the look, The aesthetic of the
cookie and the taste. But I think this one
really does both. So if you want to try
this recipe or any Of the other cookies
from Cookie Week, You can find all the
recipes on NYT Cooking. Oh my gosh, so beautiful. Oh my gosh, this is so nice. No one ever really
gives me cookies. This is so exciting. Oh, my gosh. Look, so pretty. So excited. Thank you guys so much
for making these.”

Have you ever wondered why most of the Vinaigrettes in the grocery store are made with 10, 20, sometimes even almost 30 ingredients? I remember growing up in Provence watching my mother whipping vinaigrettes before every single dinner. She would mix in a giant bowl, delicious extra virgin olive oil, a robust aged vinegar (the flavor would depend on the main dish), sea salt and pepper and voila! I decided to do the same thing for my family and friends more than 20 years ago here in this beautiful country. And Provence Kitchen® was born. Stay tune for more articles and wonderful family recipes..

Leave a Reply