
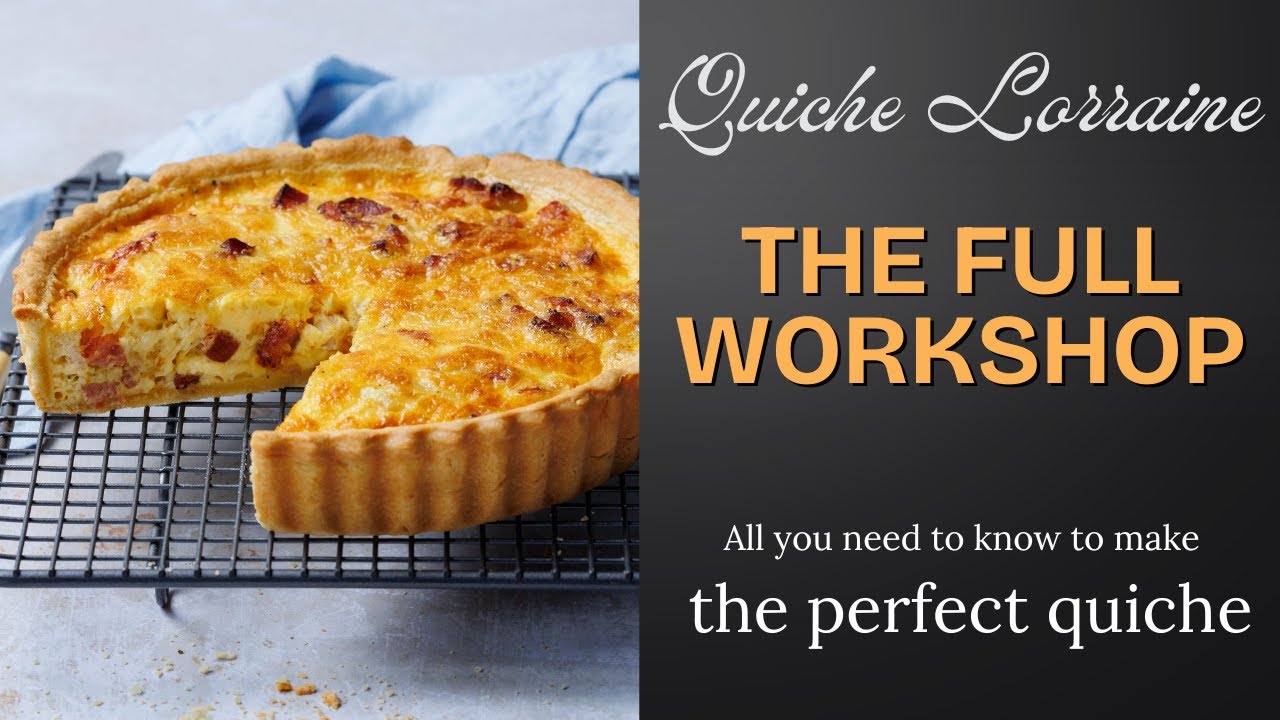
Now when spring and autumn is around the Corner depending on which side of the Hemisphere you are it is a great time to Start making kish again and for the Occasion I thought I will be running a Complete workshop on how to make a Famous kish luren so in this video we're Going to be talking about the theory of Kish the history the components what you Need to know the dos and don'ts plus a Practice session where we're going to be Choosing our kish pan making the short Crust by hand the filling choosing the Garnish cooking baking time and serving All what you need to never fail the kish Again is right here let's go now let's Start the workshop with a little bit of Theory of course and the name kish Lauren has got some meaning kish used to Be called differently you call kuchen a Bit of a Germanic name it means cake and Lauren simply means the region so it's a Region near Luxembourg in eastern France So when we hear about a kish lauren it Is a kish coming from the lauren region So it's a regional dish that is all There is to it now for the kish lauren Nowadays all what you need to know is That it is made with three core Components the first one is a savory Short crust the second one is the Filling That is called mig in the Lauren terms You know it's kind of a nickname it's
Not called fing it's called mig and the Mig or the filling is made only with Cream whole egg salt and pepper that's It the basic version has got no milk Into it nothing else for the garnish it Is smoked pork belly aka bacon there is No cheese there's no herbs or whatever I Know for some it may sound boring but The original version is really just with This free element now the reason for That is that the kish lauren has been Around since the 16th century and it was A very simple affair to me it it really Sounds like the same story as the pizza In Italy something very accessible for Any folks out there back in the days That could be making even bacon actually Was not there in the beginning the very Original kish was made only with uh the Cream and the eggs and then some luxury Has been added with some bacon but That's it for the theory now what I want To show you here is more the practical Bits uh when we're going to be making The kishen because we're going to be Making it from scratch from beginning Till end and we're going to be starting Here of course with choosing a kish pan As you will see is very important now Kish pans are they all the same well not Exactly and it pay it pays to know the Difference between one or the other Because that is really the difference Between sometimes success and failure
The main things you need to know when You choose a kiche pan if you have a Choice being at home if you're buying a New one is first the material that They're made of so metal like this is The best as it will conduct and transfer The heat it gets very hot and it's Really allows your crust to cook Properly at the bottom and on the side If you go for a ceramic dish a porcelain Dish or an earthnware like this this is Going to struggle to diffuse it and to Cook the crust because this is the Important a lot of time with these soggy Bottom issues because we using these Kinds of pan so when you use these most Likely you're going to have to blind Bake your short crust more on that later That's the first element the second Thing you need to know is the height of Your pan if you go you know and you buy A pan you may see on a magazine oh you Know what i've seen this very chunky They're great i'm going to buy this one Is very very high profile well you can Do that as long as you know that this is Going to take longer to cook than this One which is exactly the same kind of Circumference but it's a narrow profile Okay so be always mindful of this little Kind of detail in France what is the Default we use these kinds of size 26 to 28 cm as a low profile Uh kish pan like this and typically it
Is made in a metal pan because as you Would see it does not require any blind Baking but talking about blind baking Now let's go ahead and make the short Crust and talk about it so as a recap Before we begin let's remember that all What you need to know about kishpan is That they are not all the same and Depending on the type of kish pan that You use being a high profile a metal or Ceramic or porcelain you may have to Blind bake your crust you may have to Adjust the cooking time and the Temperature that's all with that in mind You can use any kishpan that you want as Long as you know about this when it Comes to the short crust I'm going to Give you here my favorite which is made With 250 g of flour 125 g of butter some Water i'll tell you about the Measurement one whole egg and salt uh Common ingredients you're going to find Here the only question you may have is This what types of flour should I use I'm using an allpurpose flour here uh Because it's one that I use all the time It doesn't have too much gluten into it Why am I mentioning this a flour with Lots of protein aka gluten is going to Be good for any preparation or baking Preparation anything you make that needs To stretch or rise so puff pastry quaso Shoe pastry that sort of things needs a Flour that's got lots of elasticity and
Because when it's got gluten it is very Elastic when you stretch it it's very Elastic and you need that so things to Rise and doesn't break off in the Instance of a kiche here or a cake you Can use a flour with a very low gluten Or protein amount and that is usually Found in the type of flour that is Referred to as cake flour you're more Than welcome to use cake flour when you Make a short crust what is the incidence Of using a can flour is going to Minimize the shrinking effect in your Crust and I'm sure you've experienced This you've seen it online the shrinkage Is a thing in that is happening because You need your dough too much or because There is a bit too much gluten into Your flour so when you make the dough Like this it's going to tend to become Elastic when you cook it because it's Elastic it's going to start to shrink Back okay so here I'm going to show you What to do to avoid the shrinkage let's Go we're going to be making our short Crust by hand a lot of people tend to Think "Oh my god it's too difficult." There's nothing hard about this you use A large bowl like this i found it is the Easier way okay and you washing your Hands thoroughly so 2 minutes with soap A good scrub uh because we're going to Use our hand to do that little gesture So the first thing we're going to take
Our Flour and we're going to sift it very Important pass it for a sip once you Have your flour we're going to take our Cubes of butter so this is cold butter Okay so it was in the fridge and it Needs to be cold because we're going to Have to work the flour with our warm Hands we need to make a sandy mixture so What we do we take uh this flour we Squeeze it in our hands like that so you Can go fast you can go slow and you can Use the tip of your finger like this to Really press the butter to make sure It's kind of you know going to that that Mixture so very quickly I'm going to Keep on working this until it gets a Little bit sandy all right so when I'm Saying sand is that kind of crumble like Mixture there's still some pieces of Butter you can see here that I need to Kind of scrub but look at this mixture So you can do this the sanding process You see take your dough it's like you're Sending away okay so when you've got the Right amount it's fine like this you Don't have to go too too far we're going To prepare the liquid so I'm going to Put this on the side okay make sure it's Nice and sandy and we're going to Prepare the liquid which is the water Mix with the eggs and salt now for the Liquid that recipe use a technique is Very simple first you need an electronic
Scale this is set on millimeters okay You can use this on ounces if you want And there's a mode that can change and All what we're going to do here we're Going to first take the whole egg and We're going to put it in and we're going To Check the weight of that egg doesn't Matter what eggs you use any egg is fine I've got 53 mil all what we want here is About 80 mil of water I mean 80 mil Sorry of liquid so I've got 53 and I Need to have Roughly enough water to reach 80 now depending on the flour you have You may have to have a little tiny bit Of more water but typically it's Fine might go over 80 because it's hard By hand like this boom 80 okay i've got My 80 ml is fine i'm going to add uh the Salt that I've got on here and my Personal touch with something is on the Baking world you're going to add a Little bit of sugar as well so salt and Sugar it's going to give a nice balanced Taste and from here going to beat the Whole Lot so now that we have our liquid we're Ready to mix it in but of course by hand It's going to be extremely messy and We're not going to bother we're going to Use now a spoon a wooden spoon and what I'm going to do here is just to kind of Pour my uh wet mixture here so this is
The whole egg with everything and then With a spoon I'm going to first work That avoid dirting my hand that I've Just re-washed again and you're going to Mix this Until you start to have some kind of Dough that forms and only once we've got That base dough that's not too wet we're Going to go back and use our hands you Can see start to forms in a kind of a Dough there okay so I'm not going to cut The camera i want you to see the whole Process so there's no trick cuz people Say "Oh he's tricking." No I'm not i'm Just making a dough so look from Here i'm going to start together Everything the key to the how things Shrink okay is the more you work your Dough and the more elastic is going to Be so as soon as it's ready like this We're going to wrap it and leave it to Rest so remember as you've seen I've Hardly kneaded the dough at all i've Kind of gathered everything together and Now I've got that nice consistency you Can see my finger in here it's nice and Soft i've got a plastic wrap under here I'm going to kind of slightly Flatten this in preparation for the Rolling Afterwards and that needs to rest at Least an hour typically 2 hours is Better but if you're short on time uh You know 1 hour minimum so I'm wrapping
It up so there's no taste from the Fridge and I'm going to place this in The fridge for one or two hours so now That the short cross is resting in the Fridge we have time to talk about the Feeding aka the mig what are the Measurements that you need to know very Simple the traditional Kish lauren uses One whole egg per 100 ml of Cream i've choosing I'm choosing here This dish for us this is a a 24 cm so The inside is 24 cm the outside is 26 cm Which is a standard size for a kiche pan And the height on that one is three Cmters a high profile one like this one I was showing has got very straight edge And the bottom is very thin therefore This is 3 and 1/2 cm high and it can go Up to 4 cm which is a lot for this very Thick kind of kish the narrow ones are 2 And 1/2 cm high and it doesn't sound Like lot like lots but uh trust me when You use the filling and you feel the pan Uh the cooking time and temperature can Vary greatly so for this one I want to Show you the blind baking i'm using the Porcelain remember porcelain does not Diffuse the heat very well so we're Going to have to blind bake in terms of Measurement I'm using three eggs with 300 ml of cream this is a heavy cream With 35% fat and I'm going to be using Salt and pepper to season and that's it And now let's talk about uh the garnish
So for the kish lauren typically in France we use the pin defime which means Typically it's a smoked pork belly aka Bacon this is pretty now my local shop Decided to slice it which is really not Convenient because in France we have This kind of matchick kind of looking Thing i'll show you afterwards but That's a smoked bacon so this is the Kind of thing we use uh for the kish but You can also use something like this Which is the Italian style panchetta Which is a pork belly that has been Cured okay dried cured seasoned and Salted it's resemble a bit of a raw ham You know that you get when a proushut or An Italian or Spanish kind of ham and if You pan fry this a little bit it doesn't Going to have the same texture and Flavor profile than the smoked bacon so The classic is the smoked bacon but if You want to change to be honest it's Absolutely not a problem let's look at The the types of cut we typically use Now when it comes to cutting the bacon For a kish lauren typically it is done Like this these are the famous lardon You must have heard this in some American or English term oh cut the Bacon into lardon lardon just like large Matchstick like pieces of bacon but this Is the penetta this is not what I want So that's the cut that it should be like But the guy from the shop decided to
Slice the uh smoked bacon so when I cut It into the kind of lon but it's very Annoying thin pieces it's not the end of The world but I'm going to have to be Very careful uh when I'm pan frying them Not to over overcook them so it is Better to have these kinds of blocks Like this it's much better and also for The bite when you're in the kitchen you Bite into this it's kind of better than The the flat one but again not a big Deal in terms of quantity once it's cut It's about 150 to 200 g and you can see Here if you have the flat streaky bacon It doesn't look great and that's going To have an impact on your final product What you want is this nice and neat one But I only have the punch so I'll be Using this one it's not a problem all Right so we've talked about the kiche Pan we've made the short crust we talked About the mig and the filling i've Showed you as well the garnish and the Weight and how to cut and now it's time To bring everything together we're going To be rolling the short crust line the Mold put the filling and bake so what do We need here for the roll a nice large Surface nice and clean rolling pin i've Got my short crust a little bit of extra Flour you can prepare your bench by Throwing or dusting the you know the Place with a little bit of flour you can Put some flour as well in your rolling
Pin a lot of people you know like to do That as well and then we're going to Place our short crust on here and we're Going to start rolling okay now this is One hour sorry this is 1 hour in the Fridge it's got the nice consistency if It's two hour or more even overnight You're going to have to leave this Outside of the fridge at least 20 Minutes uh time for it to kind of regain That kind of soft consistency so here if I take my rolling pin I can already roll You can see that dent but now let's me Zoom in let's put a proper workshop and Let's get started now for the rolling All what we need to do is to make a kind Of a circle and the ideal size is about 3 mm which is very thin a good thing When you blind bake uh even if it's a Bit thicker it doesn't really matter so If it's a bit buttery make sure it Doesn't stick and that's your bench on Here nothing sticks it's very important And the only thing I can tell you with The rolling pin you start from the Middle so you can make your dent like That you can see the dent in here and Then you typically push outwards okay Okay so I'm making a a shape on here and I'm going to go and push outwards what You don't want to do so some people are Doing you start pushing on the side and Pressing and rolling on the side because When you do that what's going to happen
You're going to have the edges are going To be super thin and the middle is going To be thick so you want always to keep Uh the sides here thicker and always Work from from the middle bit on here Okay so I'm doing a shape i'm turning And I'm just gonna go i'm not an expert At rolling at all and the good thing With that dough is that it is quite Forgiving you can work it slowly you Know you turn a little bit you roll and I'm going to keep on going like that Until it starts to get quite thin so we Get a bit of a shape okay as I said I'm Not a pro at rolling you see it's not Exactly a circle but when I'm taking my Dish here you can see how there's space In here all around you can't see really But there is you know a few centimeters At here at the bottom and on the other Side towards me that's Enough that is a bit soft for my comfort Zone here it's been 1 hour this is why 2 Hour is good you want your to be really Cold because now by the time I'm I'm Doing this things is is getting really Soft and the dough itself is becoming Really difficult uh to work with that I Don't even know is see if I'm going to Be able to put it on my on my on my Rolling pin on here okay so then I've Got my my dish on here i'm going to put It on what I've got got my my bit on Here up i'm going to put this on here
And I'm going to start to tuck this on The inside so what I've done here is Been really purposely sloppy so that you Can see even if you don't do the right Thing at home you haven't really let the Dough to rest properly it's soft it's Hard to work with it's not exactly Centered you still can make something What's important on here is when you Have your dough here at the bottom all Along you really want to tuck it in and Press the edge of the dough so it's Really that your short crust goes Straight down like that all around and Really kind of uh follows the shape of Your mold and these ceramic ones they're Really not super handy okay so you can Go around and once you have you know Your dough that is tucked in everywhere We're going to be cutting the excess so As you can see it doesn't look great but The most important is that I'm following The guidelines of really tucking the Dough properly and I can arrange with my Finger and even if I've got some excess I can now you know use my my rolling pin On here to kind of cut the excess you Can use a knife and you see that rolling Pin is really one of these cheapo things So I'm really making it hard for myself In here but I just want to show you that It's Always possible regardless we're going To keep this extra dough for something
Else and you see now I've got something Much and I'm going to keep on working Now to have a kind of a nice Outline and the same thickness around Everywhere okay so I'm using my finger And I'm going around and now I'm going To you know pay more attention of Following each shape with my finger Going around so now to finish in order To make things a little bit more tidy You see this little shape that I've done Here is with the back of the knife what I'm doing I'm taking all the excess of Dough that's going like this all these Untidy bits and I'm taking a knife and I'm making these little marks to really Almost make like an edge Uh so that the dough doesn't fall and That's a little trick you can use okay So we're going to go around and make That little edge like this it's going to Support the dough nicely so there we Have it you see I've been working with Less than ideal condition i did not rest The dough properly the pastry was way Too warm i didn't center it i plunk it On there it was a nightmare to work with Uh but it didn't break there was no Holes i still managed to put it into my Mold i didn't even put butter in my mold Sometime you can put butter and flour to Help for the stickiness but there's a Lot of butter in here uh but at the end Of the day this is the end result and
It's fine you know when you're at home It's not a problem so what we're going To do now is we're going to dock make Some little holes at the bottom of the The pastry there so the docking is Because we're going to be blind baking Is also used in classic time when you Don't blind bake is to Allow the heat to come through uh the Pastry and to avoid a kind of a big Bubble to Form at the bottom if you don't make These little holes when you blind bake The bottom here with the heat is going To start to balloon up and you're going To have this side is going to cook and You're going to have an uncooked part on Here even if you have weight so unless You got something super super heavy it's Going to try to balloon up when you make These little holes like this it kind of Prevent this so don't go too hard don't Make massive holes little fork and then We're going to put some beads and I'm Going to show you how to blind bake but Before we do so this is very warm so I'm Going to put this in the fridge or you Can even put this for 10 minutes in the Freezer to firm things up perfect so my Dough has been resting 10 minutes in the Freezer now it's nice and firm and we Can easily work with it all what we need For the blind baking is a piece of Parchment paper or you know kitchen
Paper baking paper that's going to go in The oven and here are some beads baking Beads are ceramic beads all right let's Go so remember blind baking is great When you have a very high pan or where You have something that does not diffuse The very well such as this pan like this You're sure you're not going to get a Soggy bottom your your crust is going to Be precooked and this is quite thick Remember we've been a bit slloppy it's Not 3 mm 3 minutes is very very thin Which helps the cooking so blind baking H if you're beginning with kishes it's a Good you know it's a good thing to do so We've Got our paper on here the beads Yep everything now we're going to spread Them out and make sure you see I've got Some going under there and make sure It's really going all the way on the Edges so that nothing is left a chance You want some weight and if you have More you can put more we really want to Have that dough stick to the bottom Because going to you're going to want to Balloon up and we don't want that once This is ready you're going to Prehe on at 200° C and we're going to be Putting this like that in the oven for 10 minutes you can push it to 15 minutes Typically 10 to 12 minutes is enough and Then I'll show you the result mush Course is now out of the oven i'm going
To carefully remove the beads so we can Have a look at it and be careful it's Very hot now if you wonder by the way How I do that I take the whole paper i Put it in a in a packet like this and I'm taking the packet on here and I'm Pouring the hot bit into a thick bowl so It doesn't break or anything like That so how has now been blind baked and This how it looks like but what I want To show you here is the edges remember What I said about the gluten uh in the Flour and the kneading and how your Dough can shrink a lot well look at this There's been no shrinkage whatsoever so Yes it looks rustic it's not perfect but Because we've been following this simple Basic concept and techniques it works We've managed to create short crust by Hand we've rolled it even though it was Sloppy we've blind bake it and nothing Has moved so from here we're going to Leave this to cool down on the griddle Here on the on the cooling rack you Leave your oven at 200° and we're going To prepare them again the garnish and Then assemble everything together now The first thing we're going to do here Is the bacon so I've got a carbon steel Pan medium to high heat i've waited a Few minutes for this to come to Temperature and I'm just going to really Quickly pan fried my bacon first this is A smoked bacon so I'm just going to just
A little bit because remember it's very Thin so you don't want to uh overdo it It's going to be really kind of uh chewy So two to three minutes as you can see What I'm I've done here I've rendered The fat and that's all I want i'm going To take this off i'm going to follow Straight with remember this uh cured Panetta and you're going to see so that Looks better that's the lon but you're Going to see it cooks differently so you See when it's Cured it gets translucent the fat is Melting and the the meat here is getting Very tough very quick so this is good For a carbonara or Italian pastas but For a kish like this not ideal so even After a minute like this I'm done I'm Going to take them out and put it with The rest to Finish finally we've got the Mig so I've got my three eggs that I'm Going to beat in here okay into an Omelette a slidey and I'm going to for Follow sorry with the Cream 300 mil of good quality organic Cream and I'm going to do a bit of Seasoning some salt and pepper so I'm Going to add maybe a little bit of salt On Here and Then some pepper some French recipe Which are not the classic exactly There's milk in there to make it lighter And there's also some nutmeg but here
We're just going with the traditional Now so now that I've done all this my Base is at the right temperature i can Put it on my chopping board and we're Going to just start with uh you know the Bacon that I've got so as you can see The problem with the flat pieces of Bacon is that there's no height compared To this Lad so you can use your hand but uh you Know I'm going to try to use this is Better by hand actually you can and now For the final stage we're going to add The mig over and what's important here Before you add you need to think that if You have a flat garnish like this and You got a lot of filling you're going to End up with a layer of bacon at the Bottom and the top of your slice is Going to be just that cream and eggs so This is why I don't have too Much because I just want see there so Typically I would say that when you Still see the bacon like That you'll be good because you know That you're going to have that look so 300 mil I'm going to put everything Because I don't want to throw it away But you see if I put a 300 mil in there It starts to float around now I'm not Going all the way up on here because it Balloons up when you kick a kish it's Going to it's going to raise in volume So always be conscious of these little
Things now let's talk about the final Bit which is of course cooking times and Temperature and to finish of course Temperature and baking time remember What I said it depends on your kish pan If you use metal kishpan there's no need To blind bake anything else typically High profile ceramic like this you want To blind bake if you're using a metal Kish pan the temperature and cooking Time is as follow temperature 200° C for The first 10 minutes then you reduce Your heat to 180° C and you continue to Cook for 20 minutes for that size for Roughly 24 to 26 cm type of kishpan once You blind bake because we've already Spent this 10 minutes cooking the crust Here we are going to be starting Straight off at about 180° C but because We're starting at 180 we're going to Still spend around 25 to 30 minutes to Cook the filling in here so what's Important when you're making a kish you Stay near your oven you want to see Especially when it's blind bags or what You care about is the color you don't Want something too brown at the top and You want these little patches of brown And that's it the kish will have to rest Afterwards and it will then set so if it Looks like it's not totally ready don't Worry when the color on the top is right Take it out that's what I would say so I'm going to put mine in the oven it's
Set to 180° with fan force on and I'm Going to cook it and when it's ready I Show you the result and there we have it This is the result after 26 minutes this Is the color that I like it's kind of Nice and blonde color and if it's a Little bit soft at the top don't worry Because we now need to leave the kish to Rest and cool down to room temperature And during that time it's going to be Setting you do not want to overcook your Kish do not go until it's totally brown Because it's going to if it's overcooked It's going to get watery some you can Get some kind of water bubbles inside You don't want that so my advice never Overcook let it rest be patient wait for It to be coming at room temperature and Then you can start to cut it open have a Slice and enjoy this with friends with Family with a glass of wine on a terrace Being autumn or spring it is always a Welcome edition to be honest this is Exactly what I'm going to do so if You've been following the workshop from The beginning till the end and you've Made that kish maybe your first kish Congratulation and uh I'm glad to let You know that this is actually just the Very first kish this is part of our Latest course called Kishes for All Occasion where we really deep dive in The world of French Kish making Exploring all kinds of short crusting
We've got eight different ones we've got Gluten-free short crust we've got Dairyfree short crust we got light short Crust we got olive oil olive oil based Short crust we've got gourmet short Crust and we're using these to make an Entire range of kishes uh vegetarian Kish meat kishes chicken kishes seafood Kishes and also one that is totally Dairy free glutenfree I think with Salmon and plenty of options so if You're interested to learn more about Kish and become a master um just look in The video description there's a link it Will take you to our course page and You're going to be able to see all the Juicy pictures all the things that's Involved in the course the kind of stuff That we're going to be learning and We're running a promotion for the Occasion until uh Good Friday because Almost kish week I think coming up and You're going to be able to buy that Course at a heavily reduced price Honestly everybody that took that course Has been absolutely happy there's so Much things to learn and it's fun making Kish it's fun and you can eat it so I Hope you enjoy that workshop it's a bit Long-winded but I really wanted to make This give you all the information so at Least you know how to make a proper kish Lauren and it's going to work every Single time okay I'll see you next time
For another video or workshop on the French cooking academy take care all Enjoy the kish and see you then bye Windfire don't leave me Dry baby

Have you ever wondered why most of the Vinaigrettes in the grocery store are made with 10, 20, sometimes even almost 30 ingredients? I remember growing up in Provence watching my mother whipping vinaigrettes before every single dinner. She would mix in a giant bowl, delicious extra virgin olive oil, a robust aged vinegar (the flavor would depend on the main dish), sea salt and pepper and voila! I decided to do the same thing for my family and friends more than 20 years ago here in this beautiful country. And Provence Kitchen® was born. Stay tune for more articles and wonderful family recipes..
Leave a Reply